Work with CSS editor
1 Choose module layout


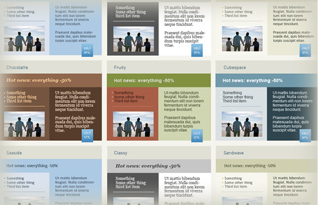
 Horizontal modul takes whole width of email.
 You can place several vertical modules next to each other.
2 Choose module type
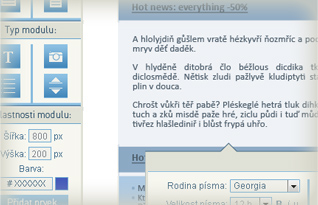
 Text module enables work with text.
 Picture module enables add photo or picture.
 List module enables to create lists with different bullet styles.
 Separator module creates empty separation space.
- You can title the modules, except separator.
- You can choose specific style (font, colour) to your headline.
- By combining of different types of modules you can easily reach complex appearance of your template.
- Pro inspiraci doporučujeme si prohlédnout v sekci Prohlížejte již vytvořené šablony, kde naleznete již hotová řešení.
Šablony je možno také editovat a tím zjistit, jakým způsobem jsou designy vytvářeny..
3 Choose attributes and add module


- Choose width, height and colour of module.
- Then add item by clicking button. Item can be modified later on..
4 Ovládání modulu (v tomto případě text)


- Modul is split to content and header (H1).
- Both these parts can be edited independently.
- Font is the same for content as well as for H1, you can change the size.
- Control panel will be shown always after choosing of module. X will close it..
5 Individual editor items
- 1 Selects used font.
- 2 Selects font size and it's style (bold, italic...).
- 3 Selects color text (hexa code or choice).
- 4 Selects background color of text field.
- 5 Sets text line height.
- 6 Content alignement (left, middle, right, bloc).
- 7 You can align link to the selection. URL defines destination.
- 8 Selects link color.
- 9 Defines, if module has header and it's color.
- 10 Selects color of header background.
- >>>
4 Ovládání modulu (v tomto případě text)


- Modul is split to content and header (H1).
- Both these parts can be edited independently.
- Control panel will be shown always after choosing of module. X will close it..
5 Individual editor items / continue
- 11 Selects font size in header.
- 12 Selects line height in header.
- 13 Defines module width.
- 14 Defines module height.
- 15 Defines padding .
- 16 Ovládá pozici modulu v celém dukumentu:
Nahoru / Dolů, Zcela nahoru / Zcela dolů
Doleva / Doprava (Pouze u vertikálních modulů). - 17 Reads already saved style.
- 18 Saves concrete style for later use.
6 Ovládání modulu obrázek


- Modul obrázek se od modulu text liší tím, že místo textu nahraje do pole obrázek.
- After click on Picture field you can choose file for upload.
- In case of picture change need just choose another file.
- Picture width and height defines it's size. It is good to upload already size-adjusted pictures to prevent deformation.
7 Ovládání modulu seznam


- Module enables to create lists with bullets.
- You can choose bullets style and its colors.
- By Enter you will add new row, started with bullet.
8 Ovládání modulu oddělovač


- Separator is the simplest module, enables separation of content.
- Main value is height defining size of free space.
Všechna zde uvedená ovládání zobrazují pouze rozdíl oproti modulu text, zbytek vlastností modulů zůstává stejný.
9 Template manipulation


- Pro průběžnou kontrolu můžete zobrazit aktuální náhled tlačítkem Zobrazit náhled.
- Pro zachování stávající práce je nutné jí uložit.
K tomu je potřeba být přihlášen. - Po stisknutí tlačítka Uložit jako si zvolíte název své šablony.
- Layout can be changed after that of course.
Tips for creation - why do the things simplier
- horizontal boxes use for simple layout: logo, text, footer.
- vertical boxes use in case of more sophisticated emails: complete header (logo+text+dat), pictures and texts in email body, split footer etc..
10 Creating newsletter from template


- After finishing of template open list of templates:
V menu zvolte Posílejte a poté Email>Šablony. - V seznamu zvolte šablonu, kterou si přejete
upravit, například některou vlastní. - Po stisknutí tlačítka pro vytvoření
newsleteru ( ) opens text editor in this case.
 - Here you can finish text accordingly.
After save new newsletter will be created.
11 Newsletter and his changes.


-
After newsletter saving its name will be shown
in newsletters list
Ten se nachází také v menu pod Posílejte
v podmenu Email>Newslettery. -
Here are some possibilities ho to deal with
newsletter. Icons from left to right:
 Edit content only,
 Edit whole newsletter (in editor),
 Send,
Send,
 Delete from list.
12 Sending newsletter


-
If you have finished whole newsletter
and you want to send it, just click the button
Odeslat. - You will be forwarded to sending form.
-
If you do not want how, read next tips
where you will find out, how to create own group
of contacts and how to work with it.


